Showing posts with label pavlova. Show all posts

Monday, April 9, 2012

How I make meringue

I thought this would be a nice thing to share, since I ramble about my love for meringue all the time. Teeheee.
I realize, especially amongst my friends, that meringue is totally under-rated. That makes me sad! Therefore, to fix this misconception about meringue, here is how I do it!

The recipe I use is an adaptation of Joy the Baker's pavlova recipe. Basically, I halved it. :) 
If you want to be successful with meringue, check and double check that your bowls are NOT greasy or wet. Any speck of either and you fail! I have heard that metal or glass mixing bowls are best for this reason, but I use plastic all the time and just make sure I wash and dry them really well before I make meringue.

Also, don't bother making this if you don't have an electric mixer. I loooooove meringue in every shape and form but I would never-ever-ever-EVER make it by hand... and not just because I'm lazy! Lol!


YOU WILL NEED:
2 large egg whites (about 1/2 cup, google says 1.18294118 dl), room temperature!!
pinch of salt
pinch of cream of tartar (or use vinegar, perhaps a 1/2 Finnish tsp)


3/4 cup sugar (2 dl)
2 1/4 US tsp corn starch  (2 1/2  Finnish tsp)
about 1 tsp vanilla, depending on your taste

(food dye gel)

Note: I use granulated sugar, but in an ideal world I would use extra fine sugar. I am just too frugal to spend the extra few cents. Lol! The granulated sugar leaves the meringue a bit gritty, which doesn't bother me. If it bothers you, try Martha's method of warming the whites with the sugar over a double boiler, that is supposed to melt the sugar down. I tried it once and thought it was a hassle, but that's just me.
Also, I use vanilla sugar (yes, it's in an imitation vanilla sugar bottle), because I like vanilla sugar more. However, it has black specks which might be displeasing to some...so then just use the imitation kind! Same goes for the US folks who use vanilla extract. I have used pure vanilla extract before and it tastes delicious but gives the white meringue a tint... I've read on some other blogs that they use clear imitation vanilla extract to avoid this.

DIRECTIONS:

In a CLEAN and DRY bowl, add egg whites with a pinch of salt and cream of tartar (or vinegar). In a small bowl, mix together the sugar, corn starch and vanilla.
(before egg whites)

Start beating the egg white mixture on a low speed, increasing slowly to mid-speed. Beat until soft peaks form...Basically it was a minute or two after this...


Next start slowly adding in small increments the sugar mixture, increasing speed gradually as you go. Once all the sugar is mixed in, increase speed to max if you aren't there yet. Beat until the meringue is very stiff, like this:

It should hang like so from the whisks and you should see really well formed trails as you are beating the meringue. I think I could have gone for stiffer yet, but I am always concerned about over-doing it. This is already really thick!


Now, you can go ahead and pipe the meringue now, or make really delicious pillowy mini-pavlovas. (serve with fruit and whipped cream).

OR you can go the extra mile and divvy up the meringue into bowls, dying them with food gel and mixing VERY carefully.
I used pink and green in honor of Easter.

Then I take a plastic baggy and fit it with the large star tip, cutting off a very small end of the bag to fit. I use the plastic baggy because I don't have a piping bag and I am too lazy to wash the decorating set I have. What floats your boat, ya know. 

Then fill the baggy from the corner and gently push the air out of the top and close. Now you are ready to pipe!

I didn't get a picture of piping since I needed both hands, but to make a kind of "star drop" like in the picture, you just pipe a bit of meringue and apply more pressure as you push down and pull up quickly stopping the pressure. If you like rosettes, here is a video for that!


Then bake in a 275 F or 135ish C oven for about 30 min, taking care not to bump or open the oven. Keep an eye on it to make sure it isn't browning, if it is, turn the oven off. If all is well after 30 min, Turn the oven off and leave for several hours or even overnight to dry.

And voila! You have beautiful meringues! :)

I would really appreciate any comments if anyone makes this... I would like to hear if you thought it was/wasn't easy and if it worked out for you!

Me thinks an Easter wrap-up post shall be next... Just gotta finish uploading the pictures etc.

Thanks for reading, see ya next time!

Sunday, July 24, 2011

WIPs, UFOs and the likes.

As promised, here is my work-in-progress/unfinished object post. Thanks for the idea to Amanda at Amanda Makes! Compiling a list and thinking about everything that has been on the back burner (and subconsciously bothering me) is now here with pictures and words and out in the open... and I have even made a list of projects I'd like to do once I have finished these! Talk about motivation to see projects to an end!!
Here is my latest project, started just this week! Finally, I too, have undertaken the granny square!
Voila! or Ta-Dah!! :)


This is a pillow case I made as a gift for my godmother who is living stateside. She loves purple ("it's the royal color") so I am planning to either complete it using this tutorial by Lucy of Attic 24 with a purple sweater or then I'll crochet a granny stripe back of purple for it. I really loved making these squares. It was a bit daunting because I had to learn a new stitch (bobble stitch) AND how to sew together squares (I'll try slip stitching next time) AND how to make a border (again learning something new: dc-tog). 
The granny square pattern is from Attic 24 as well. It is linked here.
And the tutorial I used for edging can be found here.
Thanks to the brilliant women who came up with these things and helped me on my first granny endeavor!


I started my expensive yarn (by my standards) tapestry project phase 2: green square. I haven't gotten all that far yet, even though it's as simple as just a row of sc and then turn. Ya see, that granny goodness got to me! Lol!


Here I am (no makeup - sorry, I'm rocking a natural (read lazy) summer look..) holding up my blanket so you can get an idea of just how big it's gotten. This is a project I'm taking a break from, but I am still so in love with looking at the colors. Maybe I should sew those ends in...


These are the circles in a square that I started probably over 6 months ago... I don't remember why I stopped, it probably had something to do with school/lack of time/finding a new project to start... I love these though and want to finish them into a pillow for a friend. It was supposed to be her birthday present, but maybe I can get them done in time for a housewarming gift this fall? There are 7 turquoise squares, 6 periwinkle and 2 navy blue. Hmm... was I just not liking navy at the time?
These are the yarns that torture me in my daydreams. My fingers itch to start a baby blanket made with these colors. I just looooooooooove them!!!!!!

Other projects that are in the works are strawberries like in this post. My mom and I started making a bunch of them since they were so cute...but if you guessed that they are stuck at the assemble all the parts phase, you would be very right. 

This quilt is still in the works... like the strawberries, it requires a sewing machine and time... two things I don't have at the moment. 

What do I have time  for? Fantasizing about new projects. How's this list of want-to-dos...
  • amigurumi apples
  • amigurumi lemons and limes
  • buy a teapot and crochet a cozy (just because!)
  • crochet flowers from my birthday book (100 flowers to knit and crochet by Lesley Stanfield)
  • start a pink, white and gray crochet blanket for the bedroom of either granny squares, hexagons or ripples (still trying to decide)
  • sew a tote from my birthday book by Cath Kidston (sew!) --Thanks Nina!
Not the longest list, but not the shortest either. I imagine once I get close to finished the current works in progress and attacking the above list, I should start making some Christmas presents etc again!

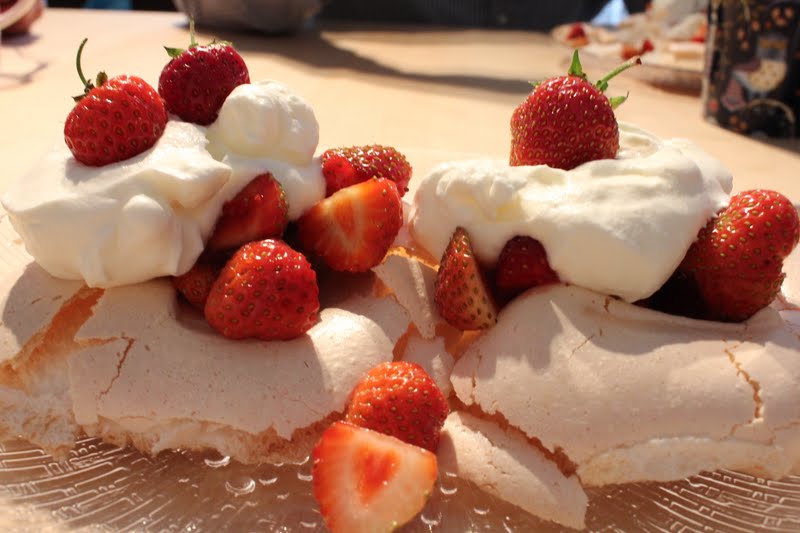
I have had the time to make pavlovas though, with red fruits from the garden: raspberries, strawberries and red currants.

It feels stupid to add to such a light-hearted post a few words about the tragedy in Norway, but my deepest condolences do go out to those affected. Flags have been at half mast here today. So sad that the world can be so dark sometimes.


Thanks for reading!

Sunday, July 10, 2011

Strawberry pavlova!!

I have fallen for pavolovas. Bad. I had to have them again!
So this time we had them after a lovely Chinese dinner with my parents. 


I love the way meringue looks!


Here they are just in the oven. They grow!


I loved this heart inside the strawberry. It reminded me of that bell pepper we had once in the shape of a heart. 


Ah, heaven. Tasty tasty light airy sweet heaven.

We had a pool installed apparently, just outside our back door! How lucky are we... 


And since our boy has an eye infection and a habit of scratching, the vet recommended using an e-collar for when we aren't supervising him and at night. He has only worn it once though, plus this time when we took some pictures of him looking silly. Gotta love Mr. Bear who is the best sport there ever was. 


We are going to pick some blueberries now, hope we find a good spot!!

Thanks for reading!

Friday, July 8, 2011

pavlova-lova

I made pavlovas. Why? Well, they're relatively easy, cheap and gluten-free. Perfect.
Oh and added benefit is that they are really fancy looking in a simple kind of elegant way...and they're sweet!!! :)


I used the recipe from Joy the Baker. Yes, I am only mildly obsessed with her recipes. I want to make them all!! If you haven't already, familiarize yourself with her recipe index. (avoid doing this when hungry though).


You can find the recipe link here.
I used a filling of thawed blueberries (must make room in the freezer for this year's haul) and bananas. Oh, and whipped cream -- added airiness. 

Don't fear meringues!
Oh and wondered what our patio looks like these days? 
 It's a nice 2-3 feet drop outside the door...

They just now started re-paving the destruction.
For comparison, here are some pictures of how it looked (the last pictures I had taken of the whole patio were from last winter, lol).


I miss our patio. And privacy bushes. :(

Well thanks for reading and happy pavlova making if you are inspired to try it!

Happy weekend!